Physical Address
304 North Cardinal St.
Dorchester Center, MA 02124
Physical Address
304 North Cardinal St.
Dorchester Center, MA 02124


This guide is designed to guide you through setting up a Domain Controller using PowerShell. If you’re looking to advance your career as a System Administrator or Helpdesk technician, learning the basics of PowerShell is a must.
I may not be an expert in Powershell, but I know enough about Google to use the search function.
Whenever you perform any task in Windows, ask yourself: “Can I do this in Powershell?” While it might take longer to complete, you’ll gain a better understanding of Powershell and scripting.
First we are going to start with renaming our computer. We will rename the computer to DC1 so we can establish a naming scheme that is relevant and not confusing.
Open Powershell as an administrator:
# Renames Computer to DC1
Rename-Computer -NewName "DC1"
Because we didn’t add the -restart flag to the end of the command, we will manually reboot the computer later.

Lets find our IP Address and set a Static IP on the network interface
# Displays ip configuration
ipconfig
Our ipconfig command output the following:
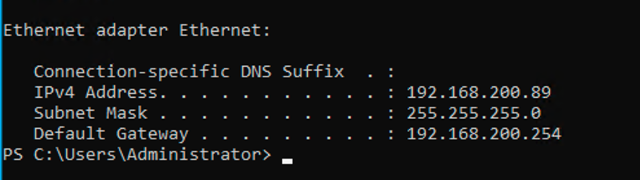
Please note that we have a Default Gateway of 192.168.200.254. Yours may be different than what I have configured in my lab environment.
# Retrieves IP address and other relevant information
Get-NetIPAddress
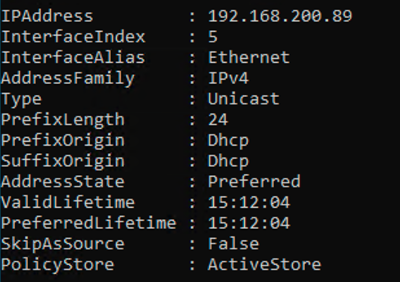
Now we see our Interface Alias is “Ethernet”. This will be helpful for setting up a Static IP in Powershell.
This may cause you to lose connection to the internet or to the Windows Host during these changes.
In Powershell:
You will need to replace the “IP Address” with the address you want your Domain Controller to be. For the “Default Gateway”, this may be the IP address of your Router.
# Sets a new IP address on the Ethernet Adapter
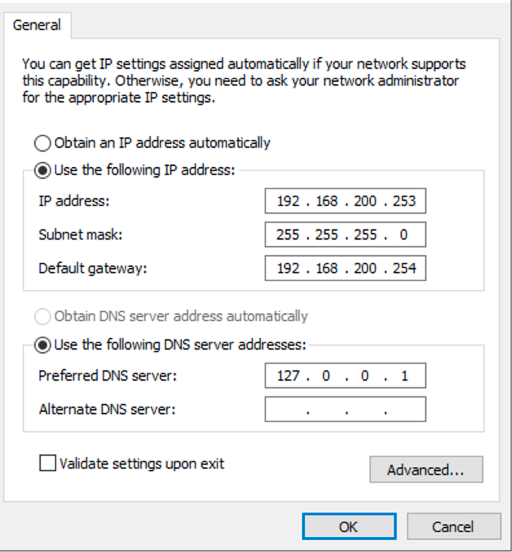
New-NetIPAddress -InterfaceAlias "Ethernet" -IPAddress IpAddressHere -PrefixLength 24 -DefaultGateway InsertGatewayHere
# Sets the DNS of DC1 to itself
Set-DnsClientServerAddress -InterfaceAlias "Ethernet" -ServerAddresses ("127.0.0.1")
You can replace the IP Address with the address you want your Domain Controller to be. For the Default Gateway, this should be the IP of your Router.
If you do not know your default gateway, you can run ipconfig on your machine to find it out. We are also assuming that your Domain Controller and your Computer are in the same network.
If you’re more advanced, this may not be the case.
Output:
If this doesn’t work, you can run the following commands to remove the DHCP interface.
These commands will cause you to lose connection on the Windows Server. You will then re-run the above commands to get the interface updated and back online.
# Removes the current DHCP configuration and routing
Remove-NetIPAddress -InterfaceAlias "Ethernet" -AddressFamily IPv4 -Confirm:$false
Remove-NetRoute -InterfaceAlias "Ethernet" -AddressFamily IPv4 -Confirm:$false
Let’s go ahead and reboot the Windows Server (Bonus Points for rebooting via Powershell)
Restart-Computer -Force
If this was a production machine, I might use the reboot option in Windows instead.
Open Powershell as an administrator
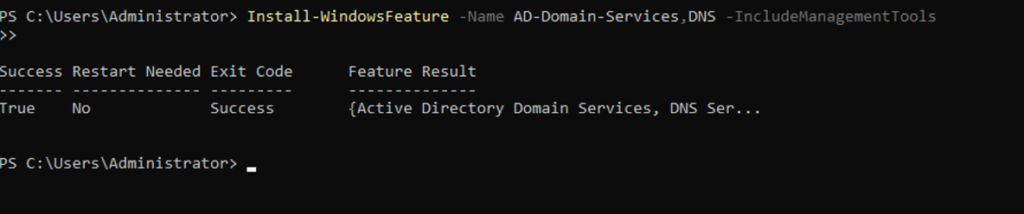
The reason why you install AD-Domain-Services and DNS is because these are the two primary roles that are needed to create a Domain Controller
# Installs the AD and DNS roles
Install-WindowsFeature -Name AD-Domain-Services,DNS -IncludeManagementTools
You will need to replace the Domain name with something you prefer. Because this is Wilfongtech. We will use wilfongtech.local
# Creates the AD Forest
Install-ADDSForest -DomainName "corp.example.com" -InstallDNS
After running the above command, it will prompt for a safe mode admin password. Make sure to save this!

After you enter the safe mode password, it will ask if you want to continue the operation. Here I use “A” for Yes to All.

Now we wait for the installation of the Domain Controller:

If everything is going to plan, we should see the following message:
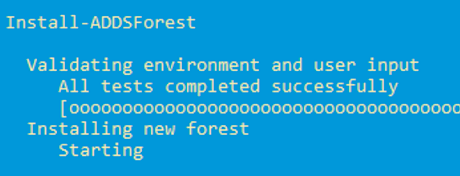
The computer will reboot after this operation is completed.
You will need to sign in to the machine with your new Domain\administrator or administrator@domain
For example, ours is wilfongtech.local\administrator
After login, let’s verify that we have the proper roles installed:
Get-ADForest
Get-ADDomain
This will output a lot of information but you should see your computer.domain everywhere. When I run my commands, I see DC1.wilfongtech.local/
You can also use the following command which will list out where the roles are.
netdom query fsmo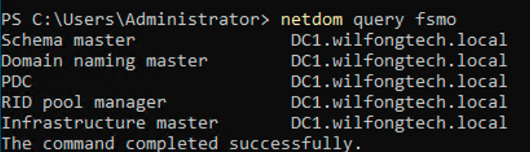
You have successfully utilized Powershell to create a Domain Controller!
